

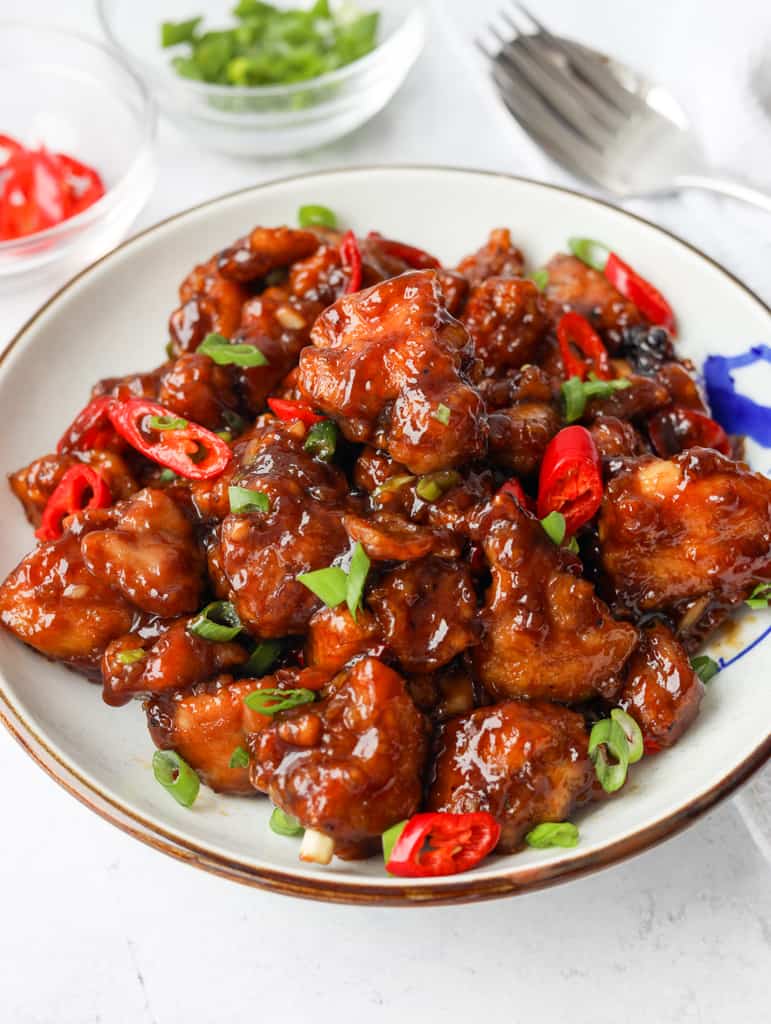
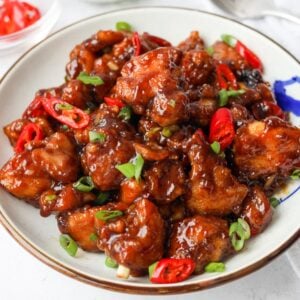
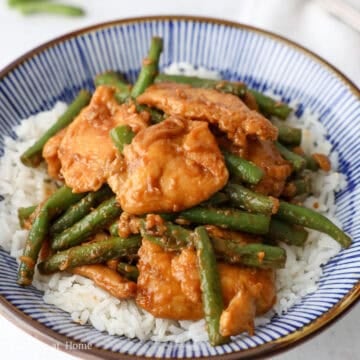
Crispy bite-sized chicken is tossed in a sticky, sweet and savory soy glaze. This easy Mongolian chicken recipe is ready in just 25 minutes. The chicken stays juicy inside with a light, crisp coating under the sauce.
Jump to:
Mongolian chicken is a Chinese-American restaurant-style dish made with crispy chicken tossed in a sweet and savory brown sauce with aromatics. Despite its name, it's not from Mongolia. The dish is associated with Mongolian barbecue, a quick stir-fry style that originated in Taiwan in the 1950s.
I first tried it at a downtown Chinese takeout restaurant and loved the sweet, sticky sauce so much that I ran home to recreate it. I found that evenly coating the chicken in cornstarch, then leaving it undisturbed in hot oil until a golden crust forms before flipping, keeps it crispy without using a ton of oil.
Why It Works
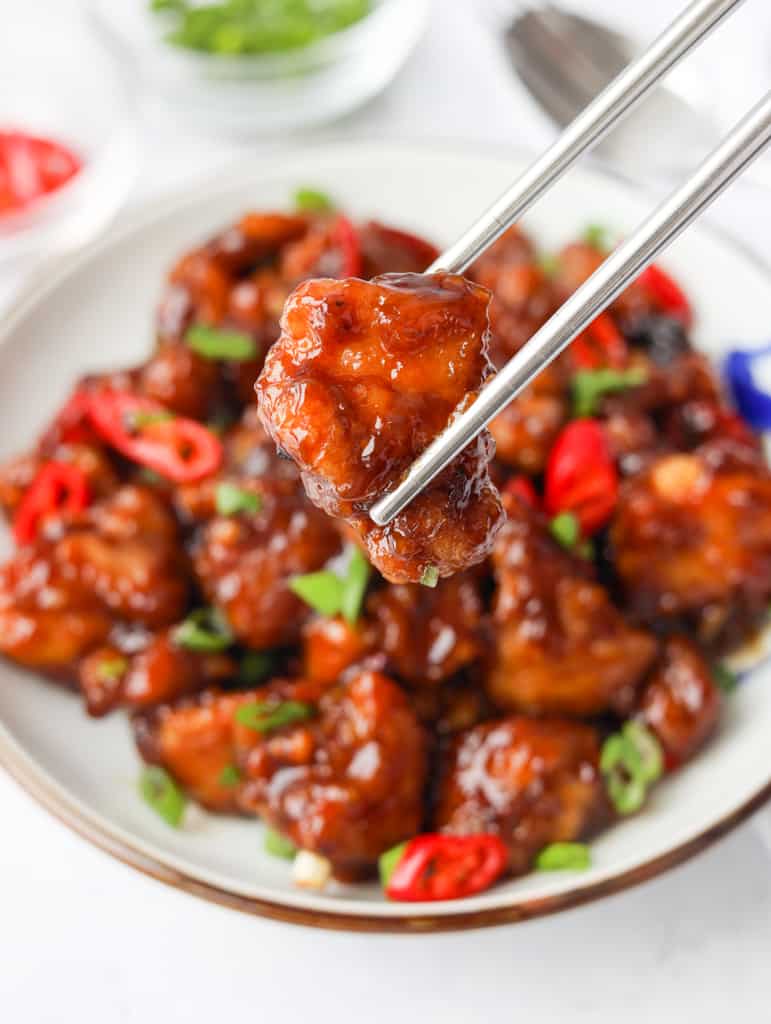
- Cornstarch coating: A dry cornstarch coating creates a light, crisp crust without a heavy wet batter.
- Hot frying oil: A heavy-bottomed pan and small batches help keep the oil at 325-350°F so the coating stays crisp instead of soggy.
- Last-minute saucing: Tossing the chicken in the thickened glaze just before serving keeps the crust from softening.
Ingredients & Substitutes
Exact ingredient amounts are listed in the recipe card at the bottom of this page.
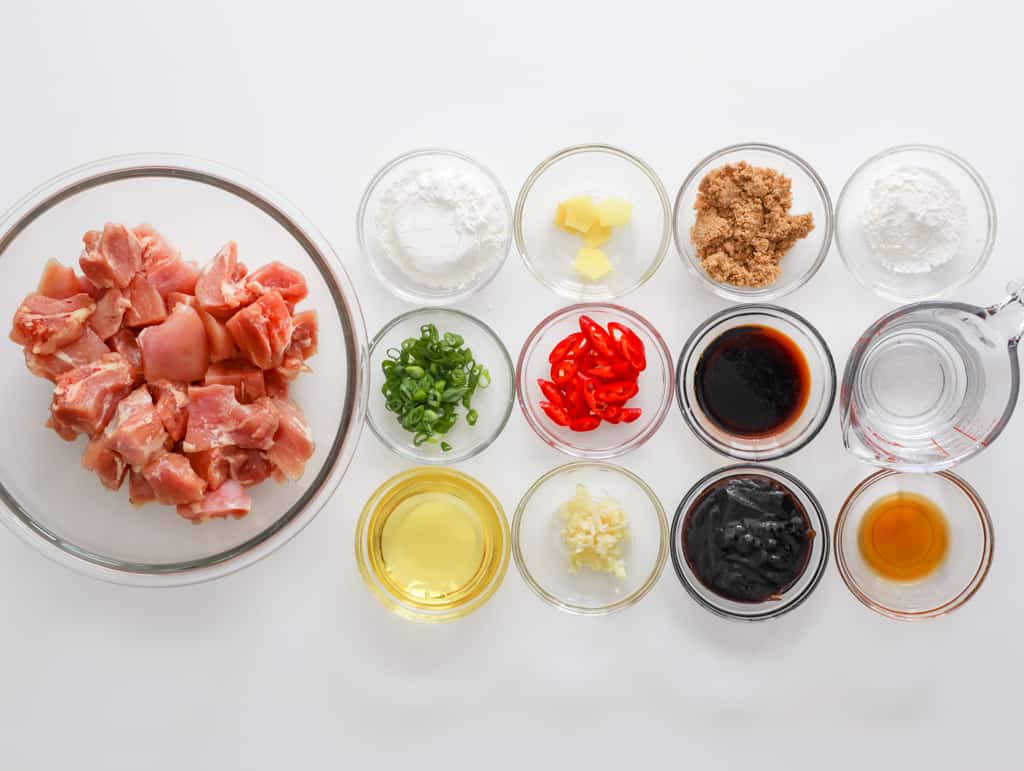
- Chicken Thighs: Boneless, skinless chicken thighs work best for juicy, tender chicken. Chicken breasts also work; cook them to 160°F, then remove from the heat and let carryover cooking bring them to 165°F.
- Cornstarch (for coating): Potato starch also works. Avoid tapioca or arrowroot starch for the coating, as they can cause the chicken to stick together.
- Vegetable Oil: Use a high-smoke-point neutral oil for clean frying. Canola, refined avocado, or peanut oil also work.
- Garlic: Freshly minced garlic is best, but jarred minced garlic also works.
- Red Chili Pepper: For milder heat, deseed and chop. For a non-spicy version, use ⅛ cup finely diced red bell pepper instead.
- Fresh Ginger
- Hoisin Sauce: Do not substitute with oyster sauce as it has a different flavor and sweetness.
- Regular Soy Sauce: Light soy sauce or low-sodium soy sauce also works.
- Brown Sugar: Light brown sugar works best, but dark brown sugar also works for a deeper molasses flavor.
- Toasted Sesame Oil: Make sure to use toasted sesame oil, not untoasted sesame oil.
- Green Onion
Cornstarch Slurry
- Cornstarch: Potato starch or tapioca starch also works for thickening the sauce.
- Cold Water
Note: Asian ingredients are typically available at most Asian grocery stores or online.
Expert Tips
- Press, then shake off. For extra crispiness, press on the cornstarch, then shake off any loose excess before frying.
- Fry soon after coating. Waiting too long lets moisture hydrate the cornstarch and make it gummy.
Instructions
Below are step-by-step instructions on how to make Mongolian chicken:
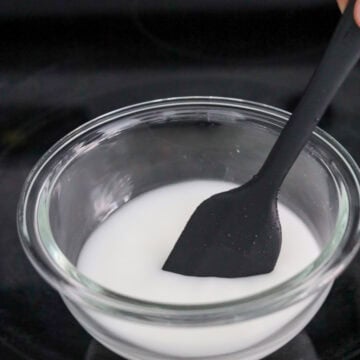
- Make the slurry: In a small bowl, whisk together 1 tablespoon cornstarch and 1⁄2 cup (125 ml) cold water until fully dissolved. Set aside.
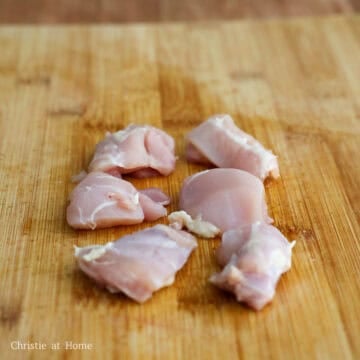
- Cube the chicken: Dice chicken thighs into uniform 1.5-inch cubes. Do not pat dry, as the moisture helps the cornstarch stick.
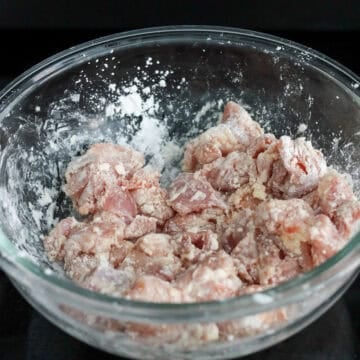
- Coat in cornstarch: Transfer the chicken to a large mixing bowl and add the cornstarch for coating. Toss until evenly coated. If any areas remain uncoated, add 1-2 tablespoons more cornstarch as needed.

- Fry the chicken: Heat the oil in a large, heavy-bottomed pan over medium-high heat to 350°F. Fry the chicken in small batches for 5-7 minutes per batch, keeping the oil at 325-350°F. Don't move the chicken until the bottom is golden and crisp, then flip and fry until the chicken reaches 165°F. Between batches, return the oil to 350°F and remove browned bits. Drain on a wire rack.
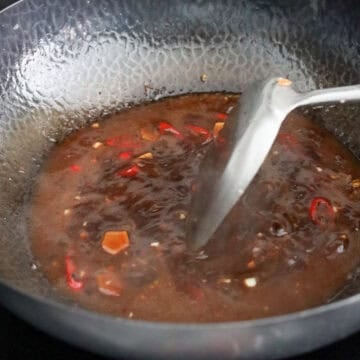
- Build the sauce: Leave 2 teaspoon oil in the pan and remove the excess. Reduce heat to medium. Stir-fry ginger, garlic, and half of the red chilies for 10 seconds. Add hoisin sauce, soy sauce, brown sugar, and sesame oil and mix to combine. Stir the cornstarch slurry again, then pour it in. Stir to combine and simmer until the sauce is thick and glossy.
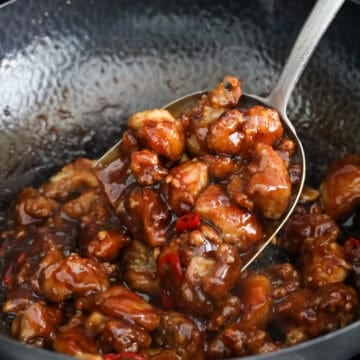
- Sauce and serve: Add the chicken and toss to coat evenly. Remove from heat, garnish with remaining red chilies and green onions, and serve immediately.
Storage & Reheating
- Refrigerator: If possible, store the chicken and sauce separately in airtight containers for up to 3 days to help keep the chicken crisp.
- Freezer: If possible, freeze the chicken and sauce separately in airtight containers for up to 2 months. Thaw overnight in the refrigerator; the coating will be less crisp after freezing.
- Reheating: For chicken stored separately, air fry at 350°F for 5 minutes or bake at 400°F for 8 minutes. Warm the sauce over low heat with a splash of water, then toss together. For sauced chicken, air fry at 350°F for 8 minutes or bake at 400°F for 12 minutes.
Variations
- Gluten-Free: Use tamari instead of soy sauce and make sure the hoisin sauce is certified gluten-free.
- Vegetarian: Replace the chicken with extra-firm tofu cut into 1-inch cubes. Press the tofu dry before coating it in cornstarch and frying until golden and crispy.
Pairing Suggestions
Serve crispy Mongolian chicken stir-fry with:
- Steamed Jasmine Rice: Soaks up the extra sweet and savory sauce.
- Garlic Green Beans: Adds a crisp vegetable side to balance the rich chicken.
- Egg Drop Soup: A light, savory starter that won't compete with the sticky sauce.
FAQ
The oil may have been too cool, the pan overcrowded, or the coated chicken left sitting too long. Keep the oil at 325-350°F, fry in small batches, and cook the chicken soon after coating.
Generously spray the air fryer basket with oil. Arrange the cornstarch-coated chicken in a single layer with space between each piece, then evenly spray the chicken with oil until no dry cornstarch spots remain. Air fry at 400°F for 10-14 minutes until golden, crispy, and cooked to 165°F. Flipping is not required.
Meanwhile, heat 2 teaspoon vegetable oil in a pan over medium heat and prepare the sauce as instructed in Step 5. Toss the air-fried chicken with the sauce just before serving.
Yes. Broccoli florets, large diced bell peppers, or sliced carrots work well. Stir-fry the vegetables separately until tender-crisp, then add them to the sauce with the chicken just before serving to help keep the coating crisp.
More Like This
Check out my other fried chicken recipes:
📖 Recipe
Easy 25-Minute Mongolian Chicken

Ingredients
- 1 lb skinless boneless chicken thighs
- ¼ cup cornstarch
- ⅓ cup vegetable oil or any neutral oil
- 2 garlic cloves minced
- 2 red chili pepper sliced, divided
- 5 slices ginger
- 4 tablespoon hoisin sauce
- 2 tablespoon regular soy sauce or light soy sauce
- 2 tablespoon brown sugar
- 2 teaspoon sesame oil toasted kind
- 1 green onion finely chopped
Cornstarch Slurry
- 1 tablespoon cornstarch
- ½ cup water cold
Instructions
- Make the slurry: In a small bowl, whisk together 1 tablespoon cornstarch and 1⁄2 cup (125 ml) cold water until fully dissolved. Set aside.
- Dice chicken thighs into uniform 1.5-inch cubes. Do not pat dry, as the moisture helps the cornstarch stick.
- Transfer the chicken to a large mixing bowl and add the cornstarch for coating. Toss until evenly coated. If any areas remain uncoated, add 1-2 tablespoons more cornstarch as needed.
- Heat the oil in a large, heavy-bottomed pan over medium-high heat to 350°F. Fry the chicken in small batches for 5-7 minutes per batch, keeping the oil at 325-350°F. Don't move the chicken until the bottom is golden and crisp, then flip and fry until the chicken reaches 165°F. Between batches, return the oil to 350°F and remove browned bits. Drain on a wire rack.
- Leave 2 teaspoon oil in the pan and remove the excess. Reduce heat to medium. Stir-fry ginger, garlic, and half of the red chilies for 10 seconds. Add hoisin sauce, soy sauce, brown sugar, and sesame oil and mix to combine. Stir the cornstarch slurry again, then pour it in. Stir to combine and simmer until the sauce is thick and glossy.
- Add the chicken and toss to coat evenly. Remove from heat, garnish with remaining red chilies and green onions, and serve immediately.
Amanda
Made this tonight and it was a hit! For those struggling to get their chicken crispy, make sure you pat the raw chicken dry before coating in corn starch. I did jasmine rice in the Instant Pot and roasted broccoli in the oven – delicious, nutritious, and dinner done in less than 40 minutes!
christieathome
Thank you so much for making my recipe Amanda! I'm so glad you enjoyed it and thanks for sharing the tip with everyone 🙂
Marie
How many teaspoons or table spoons are 5 slices of ginger? I have minced what I thought would be 5 slices worth off of my root, going by the video. I'm going ahead with what I have, but I would appreciate knowing what you would use, in spoons. Thank you.
christieathome
I would say about 1 1/2 tsp since it's minced. Since it's minced, the surface area is greater and will offer a much more powerful taste than sliced.
Tiara
hi Christie, just wondering if I could use chicken breast instead of thigh? would it make a big difference?
christieathome
Hi Tiara! You can definitely use chicken breast. I would just suggest to monitor the cooking time and perhaps reduce it to 5-6 minutes since breast tends to dry out faster than thigh due to the lack of fat content. Hope this helps!
Muskaan
Hi, this looks delicious and I'm planning on making this in the next couple of days and I had a quick question.
Do you use a normal red chili or a Thai red chili?
Thanks
christieathome
Hi there! Thank you very much! Just a normal red chili. If you'd like it spicier, you can definitely add Thai red chili. I hope you enjoy my recipe 🙂
Jessica
This was amazing! So simple, flavorful and authentic. Can't wait to try more of your recipes!
christieathome
Thank you so much for making my recipe Jessica! I am very happy to read this kind comment 🙂 Have a lovely day!
Cheryl
I love this dish! I love the flavour so much that I am actually going to try replacing the chicken with cauliflower for a vegetarian friend - wish me luck!
christieathome
I am so happy to read this Cheryl! Thank you very much for making my recipe and good luck with the cauliflower substitution! I would love to hear how that goes. Have a great day!
Elias
Fantastic! Thanks for sharing. My fickle Missus loves it.
christieathome
I'm so happy to read this! Thank you for making my recipe and glad you both enjoyed it, Elias!
Allison Elligson
I didn't have chicken to cube on hand, so I swapped the chicken for a cubed venison roast. Let me tell you - it tastes incredible. I followed the recipe exactly as it is printed and it turned out amazing.
christieathome
I am so happy to read that this worked out well with venison! Thank you so much for making my recipe Allison! Glad you enjoyed it 🙂
Naomi
I just made this for my family and it was a big hit! Thanks for sharing your recipes with us! It’s the first one of yours that I’ve tried, and I can hardly wait to try more!
christieathome
This is music to my ears! I am so very happy to hear that you enjoyed my recipe with your family 🙂 Thank you for taking the time to make it and I hope you enjoy my other recipes!
Chris F
Do you leave the ginger in the mix and eat it with the skin?
christieathome
Yes, I leave the skin on but feel free to remove it to your liking.
Kathy Haupers
Was very flavorful and so easy to prepare. Prep time was longer than stated in recipe but we’ll worth it. I had some asparagus in the frig so I quickly stir fried it before the chicken. Definitely on my rotation.
christieathome
So glad you enjoyed my recipe! Thank you for making it 🙂
Maddi
Just made this recipe for lunch! Super fast and super delicious! 10/10 recommend!
christieathome
I am so glad to hear that you enjoyed this! Thank you so much for making my recipe ☺️
Cori
This recipe was shared with me and I’m so glad I tried it. Seriously delicious and so easy to make. I skipped the red chili (none in stock when I was at the grocery store) and chopped the ginger as I did with the garlic. Super easy, packed with flavour, will definitely be making this many times again!
christieathome
Thank you so much Cori for making my recipe! This makes me so happy to read and I am really glad you enjoyed it!!
Have a lovely day! - Christie
Sarah
This was delicious! My chicken was barely crispy, some pieces not at all. But it hit temp so I pulled it because I didn’t want to overcook. Where did I go wrong? More cornstarch? Higher temp?
christieathome
Thanks Sarah! Glad it was delicious. Sorry to hear you had some difficulty getting it crispy. I find it really depends on each stovetop's temperature setting as they can vary from brand to brand. For future, I would definitely coat the chicken in more cornstarch until each piece is all white and then increase the temperature to a higher heat setting until you start to see the crispy golden texture. Since chicken thigh is used in this recipe (unlike chicken breast), it's a very forgiving cut of meat. So even if you overcook it just a bit, it will still remain tender and juicy. Hope this helps!
Elizabeth
Tried this tonight. I "marinated" the chicken in soy sauce (cut back on the amount) and cornstarch. I added chili oil to the sesame oil, and broccoli and fresh red peppers, and was liberal with the ginger and garlic (we like spicy). Served with basmati rice. Great recipe that adapts well to personal taste and has depth of flavors. Thanks for sharing!
christieathome
Thanks for making my recipe Elizabeth! Glad you enjoyed it.
Sharon
Mine didn’t come out as dark- maybe because I used light brown sugar? My family still loved it!
christieathome
Thanks for making my recipe Sharon! I am so happy to hear this! It could be depending on how long you fried the chicken for, if it's longer the chicken will come out more darker. Hope this helps!